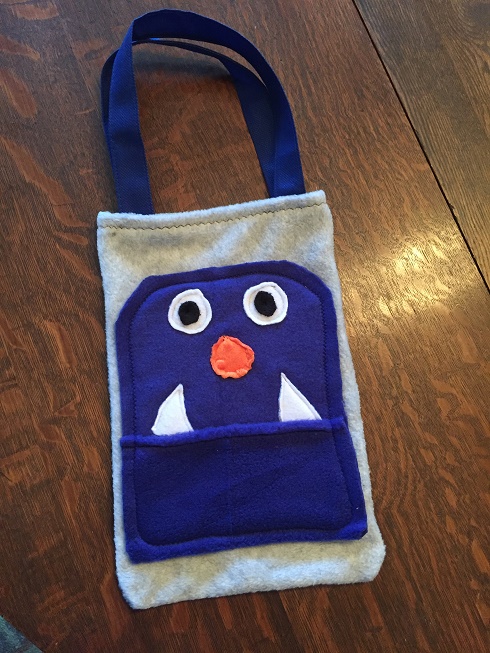
I think all little kids go through the hoarding phase. My little man Jack has a favorite things collection that he just loves to haul around. Its full of these horribly ugly little characters call trashies. Don’t know what they are? Just ask him and you will know more than you ever wanted to about the toys. Basically they are things you would find in the trash and a lot of times they are really gross looking and supposed to be covered in bodily fluids. He hauls them around in whatever he can find – an old shoe box, a tupperware container, a ziplock. So for his gift I thought I would make him his own special bag to keep his collection – like a marble bag but this one is a trashie bag. I thought about making a trashie figure on the front but I just couldn’t get myself to sew fabric puke or snot. So I just made a monster on the front instead.
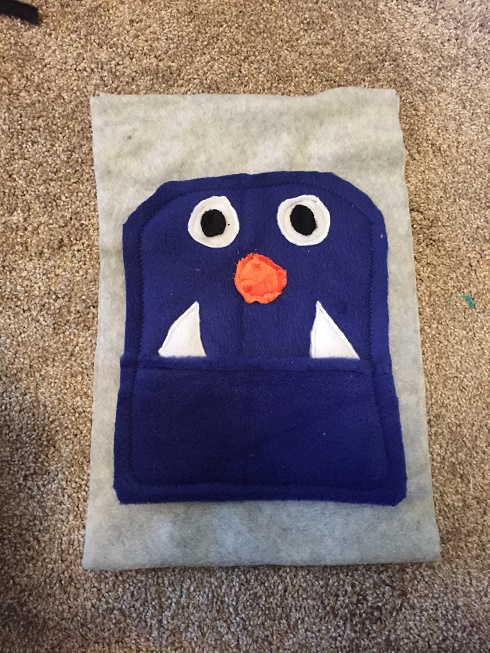
First I got a long piece of gray felt. I think it was about 10″ x 28″ but you can make yours any size you want it to be. You will eventually be folding this in half lengthwise for your final size bag. On the top half of the rectangle or what is going to be the front of my bag I created a monster face. As you can see I used a blue piece of felt for the face. I started with a rectangle and then took and folded it up a 1/3 of the way to create a mouth which also acts as front pocket. Trim the corners so you end up with more of an oval shape and then added your eyes, nose and monster teeth. Top stitch all the pieces down.
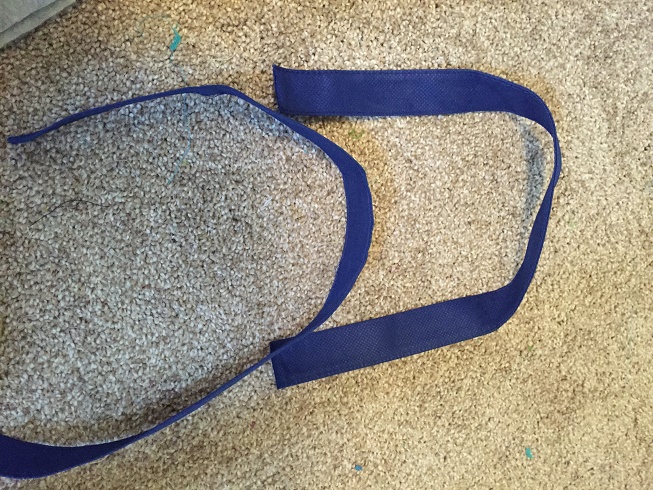
Next I started thinking about what I could use for straps. I could just make them from felt too but then I thought about the reusable bags you get from the grocery store or as freebies from the bank. I had a blue one that would match my blue felt and the handles are nice and strong. It was perfect, so I just cut them off the reusable bag and repurposed them for my monster bag.
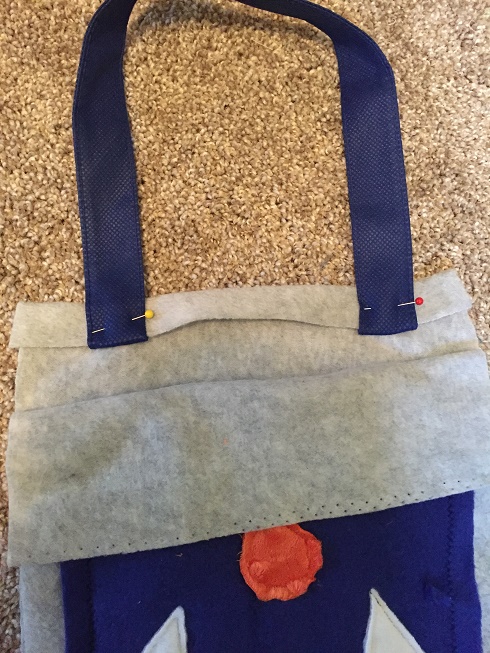
Attach them by placing them on the inside of the bag and folding about a 1″ piece of the grey felt over them…
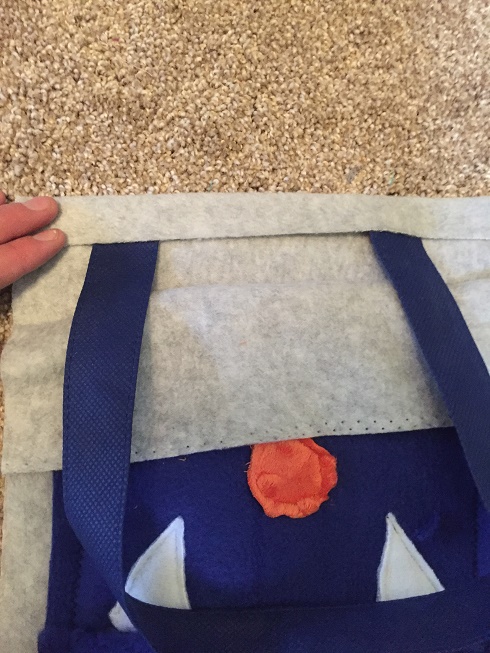
Then fold your straps back up, pin and sew. I did a zig zag top stitch just for aesthetics.
Now you are ready to sew the sides of your grey felt together to form your bag. Since felt doesn’t really fray you could just do a top stitch again. I chose to hide my stitch by placing my bag right sides together and stitching up the sides. Then you pull your bag out so its not inside out anymore and your done! One monster bag for your little monster. Now my little Jack can hoard ugly tiny choking hazard toys to his hearts desire 😉
FYI, I got inspiration from this bag by looking at a picture I saw on pinterest.

I didn’t follow their instructions but I think they would be very similar to what i have done. It looks like for the monster face they may have used felt or a stiffer fleece to get cleaner cuts. They also added a step by sewing little “spacers” on the lower mouth pocket to store crayons. I think this is an adorable idea as well. You would just want to make sure your bag is wide enough to fit a coloring book. Here is the link to the site for this particular bag Crayon Monster Bag
You wouldn’t have to stick with monsters either. Customize it to your child’s interest. Maybe a football or basket ball, a flower, your child’s name or initials. There are so many options! Have fun with it!