Sometimes people joke with me when they see pictures of the farmhouse and say “I want to come live with you!” and I always joke back, “Ok but I’m warning you there’s only 1 bathroom!”
Old houses are super packed with charm but they can have some challenges too. We are lucky ours doesn’t have too many quirks to work around but some may consider the fact that a family of 6 shares one small bathroom a bit of a problem. And I won’t lie sometimes it can be a bit of challenge – especially when the flu hits the house! But I know there are many larger families out there sharing just one bathroom and it really is such a first world problem to have. Besides I like to think I’m teaching my kids some important lessons – such as strong bladders from having to wait their turn or the fact they probably will never have a shy bladder due to the fact they don’t think twice about barging in to, ahem, make a number 2 while I’m in the shower.
Yes in a perfect world I would love to be able to put in a second commode however that’s just not in the cards right now – and that’s ok. Learning to be content with what you have is also a valuable lesson. However just because I’m content with the one bathroom we have right now doesn’t mean I didn’t want to freshen it up! Here’s the thing though I couldn’t spend a lot of money (we had a family vacation this summer and I wanted to spend any extra money we had on making memories, not on a bathroom!) and also being it’s our only bathroom, there couldn’t be much down time.
Here are a couple before pictures. When the house was built in 1908 obviously there was no indoor plumbing so this bathroom was added sometime in the 1970’s.
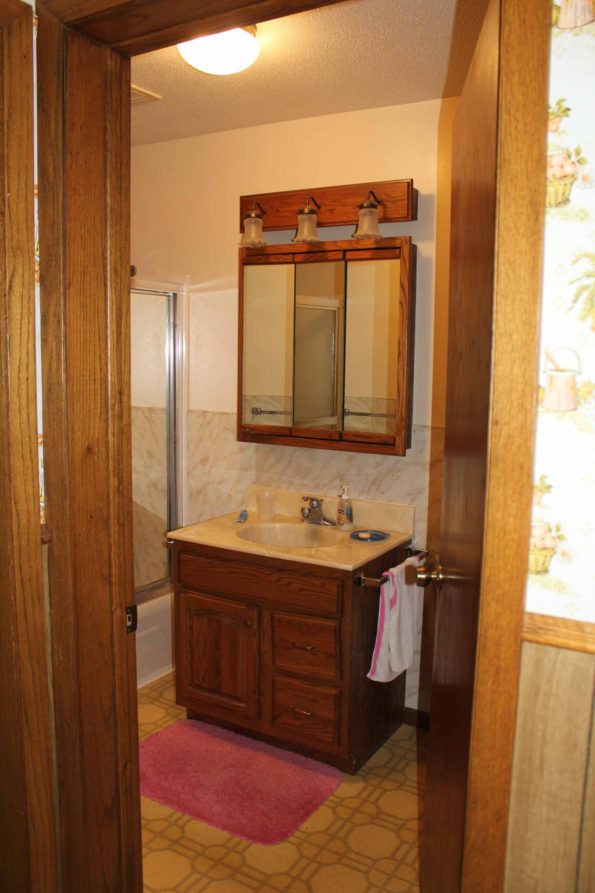
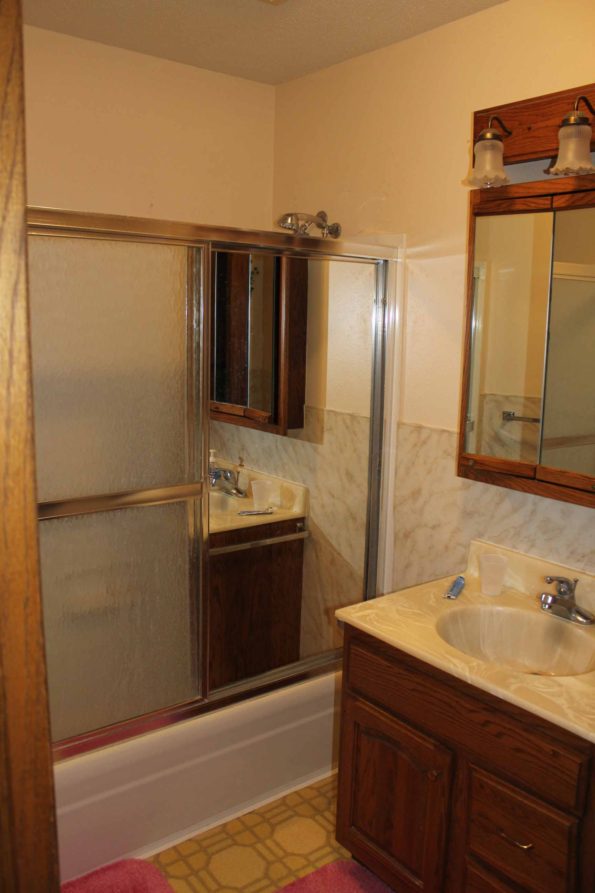
Not too bad – the bathtub and toilet are not avocado green or pink at least, right?! That was huge score in my book!
The first thing we opted to do was remove the shower door. It was leaking and was literally a pain in my side when I was trying to give babies a bath. Also, the flooring in the kitchen extended into the bathroom so when we had new vinyl flooring installed in our kitchen two years ago we had them do the bathroom as well. It was such a tiny place and it made sense to have them do it while they were here. So that expense was taken care of at that time. I guess you could really call this a phase 2 update.
So for phase 2 I decided to replace a few key elements that would give me the biggest bang for my buck. Here’s what we did:
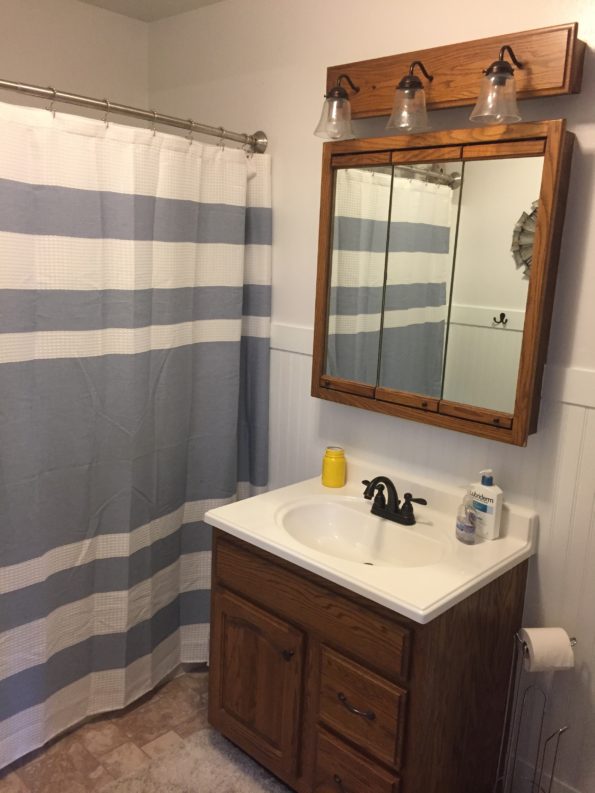
- Removed the laminate wall covering and replaced with beadboard paneling. The space is small so it only took 2 sheets which totaled $40. I’m not going to say it was easy and I want to give a big shout out to my hubby for putting a lot of work into it. He actually had to remove the vanity and toilet so we could get to the areas behind them – and carefully because we would be reusing them. We were able to get most of it accomplished in an evening (with only one break to run to grandma’s house to use the bathroom – because when you take the toilet off, every child decides they need to poop really bad!)
- I thought briefly about replacing the vanity but after a quick look around I found that to get a good quality vanity I would need to pay more than I wanted to at this point. I didn’t want to pay money to replace our real wood vanity with particle board. So we kept what we had and just replaced the sink top with a basic white version and installed a much needed new faucet in a bronze color. I also replaced the hardware with some extra bronze hardware I had on hand from our kitchen remodel.
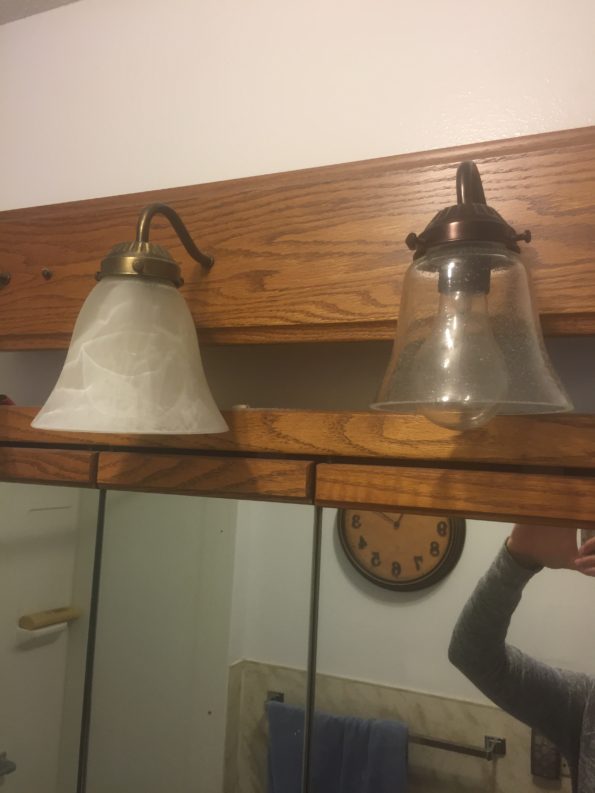
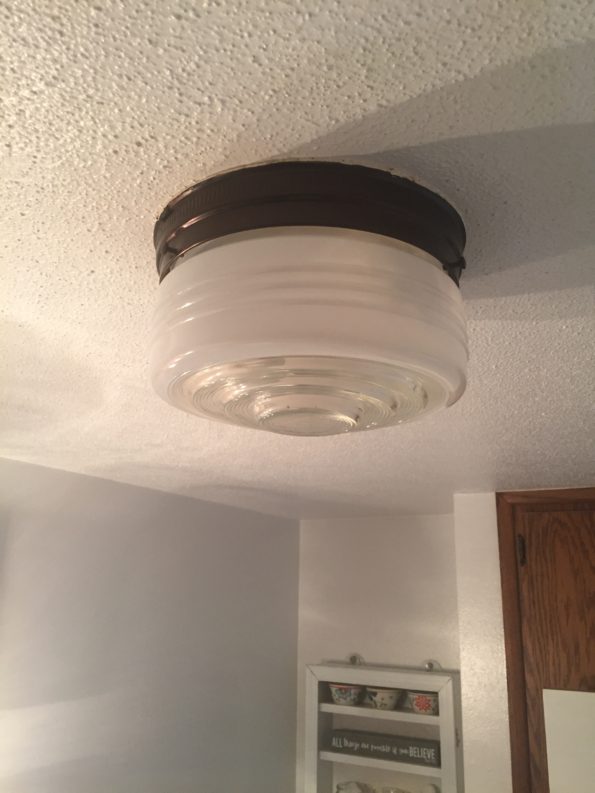
- To address the lighting I got the most creative and I’m pretty pumped about how it turned out! You guys, I colored the metal parts with a black sharpie and the gold now has the appearance of bronze to match the faucet and cabinet hardware! Then I purchased cheap shade replacements for the sconces and overhead light for a total of $30.
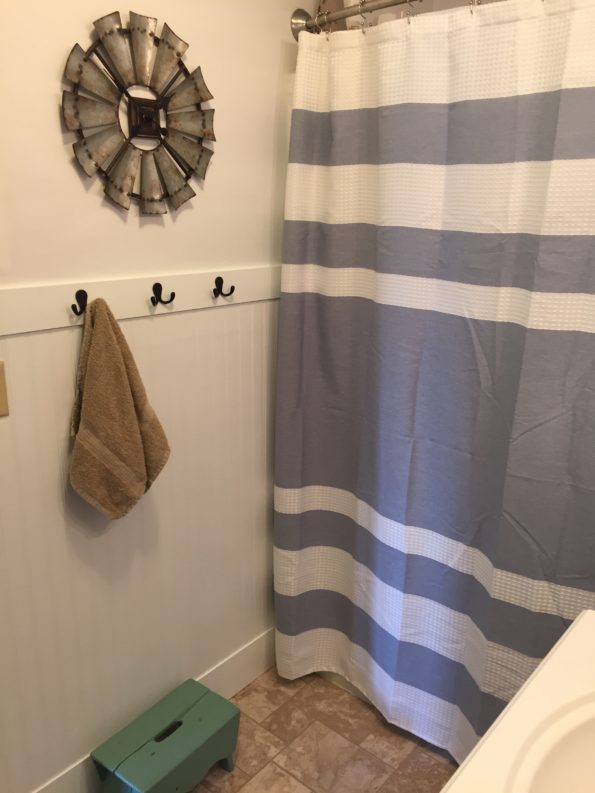
- Next was just accessories: a new curtain, hooks instead of a towel bar, a clock which I stole from my laundry room and of course I had to include a couple pieces that are near and dear to my heart.
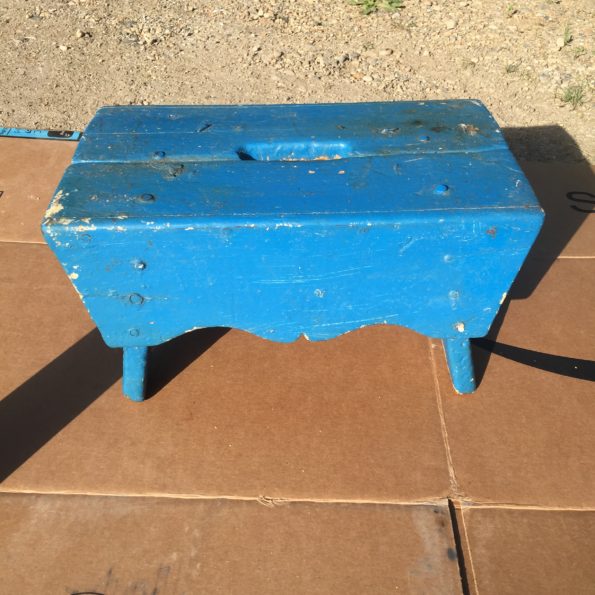
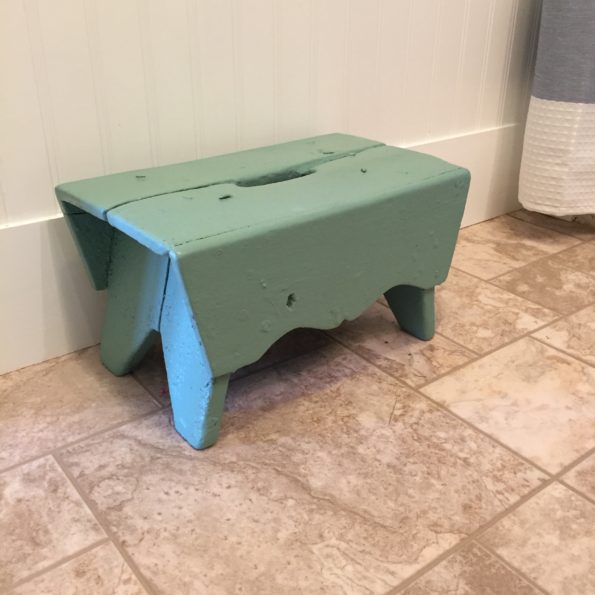
- This is an old stool that I always remember my grandma having in her house. One time she let me paint a couple wooden chairs at her house in any color I wanted (cuz grandma’s are awesome). I apparently chose cookie monster blue since I was probably 8. Anyways we had extra paint so this guy got the same sesame street decor treatment as well. After all these years I decided it was time to tone it down a notch. So I cleaned it up, added some extra screws to strengthen it and gave it a new sea foam green color with some extra spray paint I had on hand. Here’s the before picture of that stool. It’s perfect my littles to use to give them the extra boost they need for washing hands and brushing teeth or for to just set a candle on if you are taking a bath.
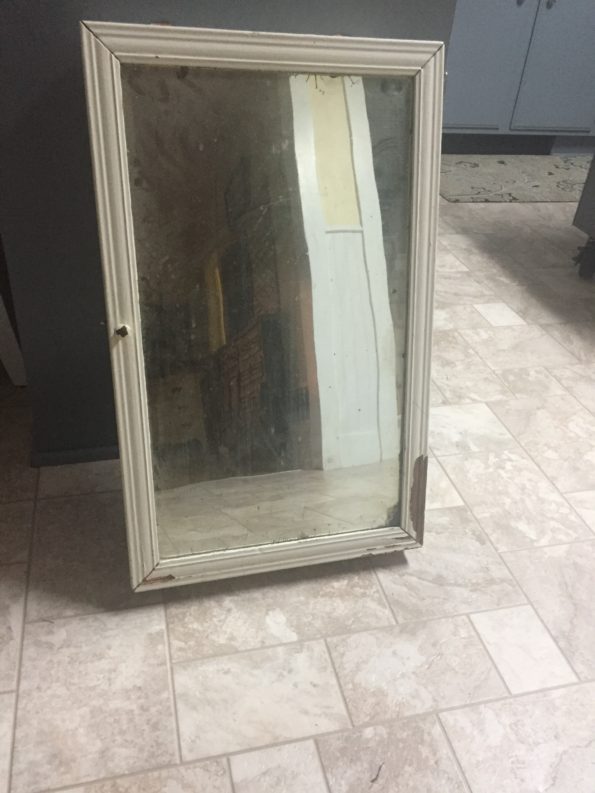
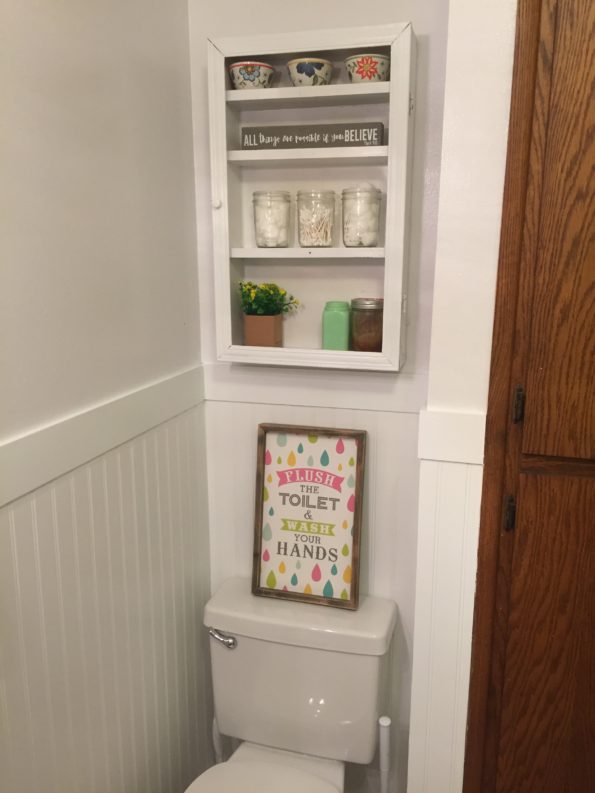
- Next is a really cool piece. Grandpa showed us this medicine cabinet in the basement when we were moving in one day and told us this really neat story about how it belonged to his father and how he remembered as a small boy holding the candle light up for his father to use to shave in the mirror. I loved it and knew one day I needed to display it somewhere. Since the toilet is recessed in a bit I decided it would look really neat hanging on the wall above it. After much thought I chose to remove the mirror store it in a safe spot. This way I could use the shelves to display items to bring some color into the space. Also, even though the chippy look was really neat I was pretty sure it was lead paint that could end up deteriorating even more in a moist environment like a bathroom. Because of this I took it outside, sanded it down and gave it a fresh white coat of paint to seal it up. Here is the before picture of the cabinet.
- This is an old stool that I always remember my grandma having in her house. One time she let me paint a couple wooden chairs at her house in any color I wanted (cuz grandma’s are awesome). I apparently chose cookie monster blue since I was probably 8. Anyways we had extra paint so this guy got the same sesame street decor treatment as well. After all these years I decided it was time to tone it down a notch. So I cleaned it up, added some extra screws to strengthen it and gave it a new sea foam green color with some extra spray paint I had on hand. Here’s the before picture of that stool. It’s perfect my littles to use to give them the extra boost they need for washing hands and brushing teeth or for to just set a candle on if you are taking a bath.
It’s really a difficult space to photograph due to the fact it is small and there is no natural light but these changes really make a huge difference.
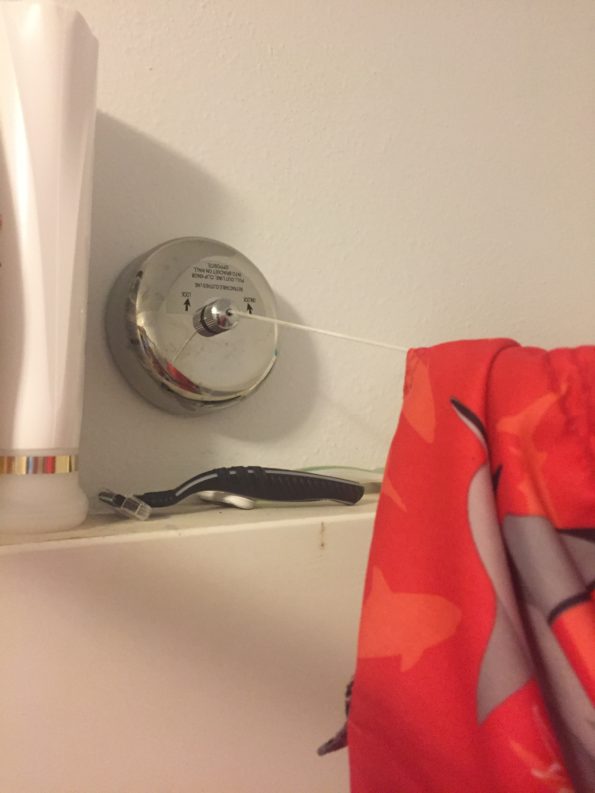
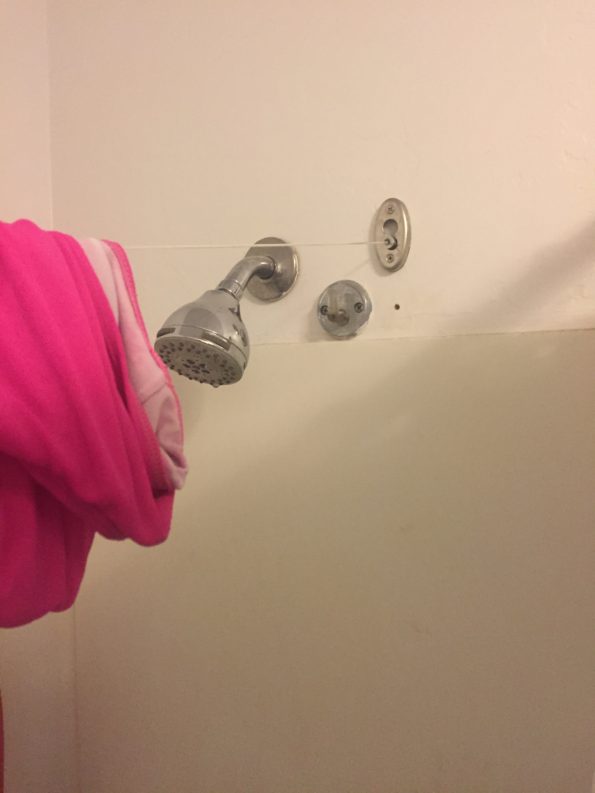
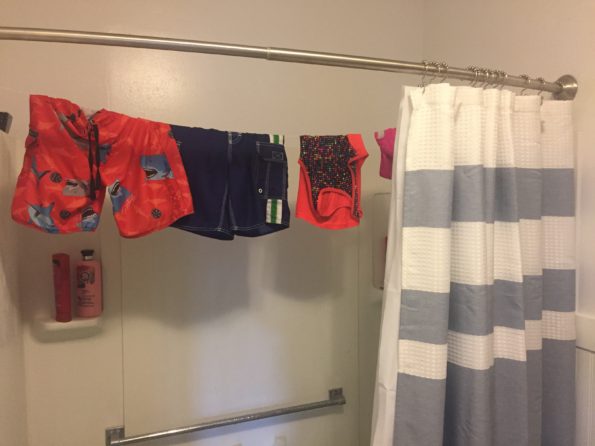
Also, one quick last thing I added that I love. One time I was staying at a hotel and they had retractable clothes line in their shower. I thought how brilliant is that so your wet clothes that you don’t want to dry don’t need to be dripping all over your floor! Plus sometimes you need more space than you have room for on a clothes drying rack. So installed one and I use it for our swim suits all the time! I love it! Here’s a pic. Ignore all the real life stuff – I’m not going to “stage” my shampoo items – ain’t nobody got time for that! 🙂
So that’s it! Our one and only small bathroom. It’s not high end or fancy but its pretty and functional and its fits the needs our family just the way it is.
LOL (Lots of love!)
Heather

Wonderful ideas! Looks great.
We too raised 4 children with one bathroom. Challenging, to say the least. Especially the time 3 of us got food poisoning. Uffda!
What a great transformation! Love it!
This looks fabulous! Great job!